electronics
This page is a repository of information that I have gathered through study, research on the web, personal research, and experience. No copyrighted materials are intentionally included without permission from the copyright owner. If you are the owner of copyrighted material that has inadvertently been published here, please let me know and I will remove it immediately.
Antenna notes
During my amateur radio career, I have experimented with simple wire antennas, as well as some inexpensive commercial antennas. As time permits, I will relate those experiences and offer my impressions and opinions about their effeciveness.
My most recent experiment is a portable vertical, primarily to use indoors as shows and events to demonstrate IsoCat sound card interface. A plumbers delight, consisting of a couple of foot-long sections of hard copper tubing, a salvaged B&W mini-ductor, some PVC fittings, a Buddi-pole collapsible antenna rod, and a few bolts. Cash outlay, $10.00 for the Buddipole antenna and about $5.00 at the hardware store. The rest is salvage and scrap. Pictures and a parts list when I get some performance data.
Batteries and chargers
I enjoy low power portable operation for several reasons, not the least of which is cost. Most QRP gear is less expensive to acquire and operate. I have designed a battery charger to maintain sealed lead-acid batteries to power the station equipment.
Digital communication modes
I have developed a USB control and sound card interface to enable digital (PSK, RTTY, Olivia, ...) mode operation using a typical HF transceiver and a computer with a sound card. There is a lot of really good software available, but I did not like the interface electronics that was available when I got started on the project. My version of an ideal interface is the IsoCat sound card interface. Available now as a kit, I also plan to make it available completed and ready to put on the air.
New project ideas
Toying with a couple of new projects. One is a restoration project.
I have a Zenith table radio from the late 1940s that belonged to my
Grandmother before she passed away. I will have to rewire it - the old
rubber-coated wiring inside is cracked and brittle. I'd be afraid to
operate it in that condition. I'm expecting to have to replace all the
capacitors and most of the resistors also. The speaker appears to still
be good, and I'll need one IF transformer at least - looks like someone
cobbled one in in the past and it doesn't fit properly.
Another project on the planning workbench is a small AM tube
transmitter, built as ham would have done in the 1960s. Schematic is
done, and I have started the search for parts.
Accessories
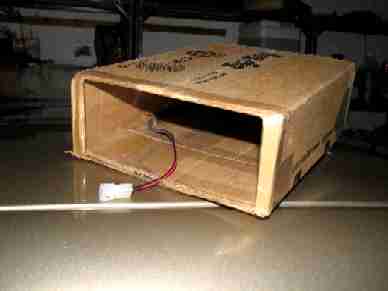
From time to time, I come up with an idea to improve things around the station. My latest is a cooling accessory for the IC7000, particularly when operating mobile. This is a very fine radio that packs a lot of performance in a very small package. It is actually physically smaller than either the '703 or the '706, delivers a solid 100W on HF and 6M, and gets quite warm in normal operation. Icom says not to worry about it. My 40 years experience in electronics says heat build-up is to be avoided when possible.
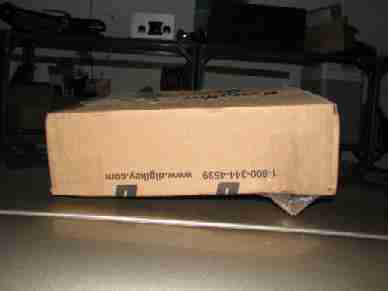
My solution is to ensure a steady airflow across the radio. The prototype was hastily assembled the evening before a trip to Florida, and has remained a prototype a year later. The temperature indication stays in the lower 1/3 of the scale, regardless of how long the radio is operated. As an added bonus, the radio is somewhat protected from scratches and dings when placed in the car. I don't leave the radio in the car all the time because it also sees service as a bench radio.
 |
 |
 |
 |
I connect the remote cable to the front of the radio after removing the control head. Don't forget the little screw. Trust me on this!
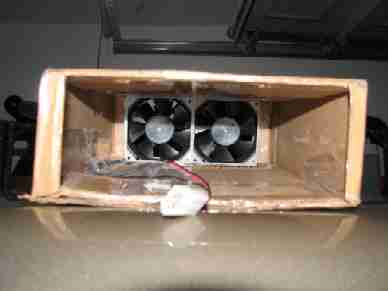
Next, slide the radio into the open end of the enclosure and connect the power, antenna, ground, and fan power conectors. I set the radio on the floor under the passenger seat, with the cables tucked out of the way of passengers getting in and out.
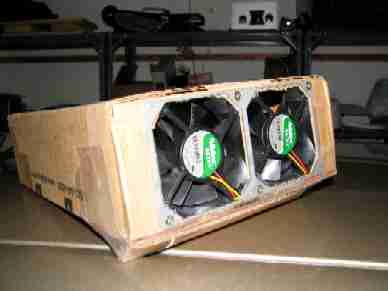
The fans are powered from the antenna tuner connector, so they turn on when the radio is on. I got them surplus, along with the mounting plates to stiffen the cardboard. The original plan was to test the cardboard box, then build a better version of thin (3/16" or 1/8") plywood from the hobby shop.
This idea could be adapted for the bench also, just cut an opening for the cables near the fans so you could feed the cables through the box, connect the radio, then slide the radio into position.